iWeb Tip #27 – CSS Buttons in iWeb
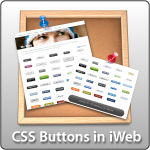
This tip is a very easy and helpful tip for any iWeb site. It allows you to easily add great looking buttons to your iWebsite. Usually to create buttons in iWeb you have to use the iWeb shapes with some creative colors, but this tip simply has you paste some code in an HTML Snippet hit apply and you’ll have a beautiful CSS button. CSS stands for Cascading Style Sheets and is the core to the style, colors, fonts, etc to any website. So we are using this type of code to create buttons only using code, meaning no images or anything. They end up looking fantastic on your site, load very quickly, and are very easy to put into your site. So let’s get started on how to get them into your site.
CSS Buttons
Really all there is to this tip is find the button your want below, copy the code, and paste it into an HTML Snippet. That’s really all there is to it. View the buttons below to view all the buttons and their interactive rollovers, then find matching button code to paste into your site.
[iWeb-Code=’css_buttons’]
CSS Button HTML Snippet Code
Simply click the button that you’d like to add, copy the code, and paste it into an HTML Snippet. Don’t forget to change the link URL and button text at the bottom of the code.
[EXPAND Button-1]
[snipt code=”9d6b7f8a89498b304460bda117e7cbb5″]
[/EXPAND]
[EXPAND Button-2]
[snipt code=”ab76d80cf5bbeca1989505462e17c048″]
[/EXPAND]
[EXPAND Button-3]
[snipt code=”5e36ea861a9f5cee86ee1ea33ec8713a”]
[/EXPAND]
[EXPAND Button-4]
[snipt code=”ad3c1b2c792edf576453f65ce056b611″]
[/EXPAND]
[EXPAND Button-5]
[snipt code=”816a638badb719fd8b8f1a970648cd2a”]
[/EXPAND]
[EXPAND Button-6]
[snipt code=”1374a529042b0c787f3ef9881addaf23″]
[/EXPAND]
[EXPAND Button-7]
[snipt code=”2d2ac838dea87930e10e70c8bb5a1cd1″]
[/EXPAND]
[EXPAND Button-8]
[snipt code=”df8d8eea3625ef4675f6f0592d05a21f”]
[/EXPAND]
[EXPAND Button-9]
[snipt code=”f766016428aa808624f0905ff926006d”]
[/EXPAND]
[EXPAND Button-10]
[snipt code=”374169c1f94c0b98da307eddcceee997″]
[/EXPAND]
[EXPAND Button-11]
[snipt code=”8a5b2fe59e8d6c877ea468a74991db54″]
[/EXPAND]
[EXPAND Button-12]
[snipt code=”8c9285bea48ddad67d47db192abe415f”]
[/EXPAND]
Customization
The only customization you’ll need to do is regarding perhaps colors, fonts, and sizes. So to do that just find the line in the code that has what element you want to edit and change it to what you want. For example you might see the line of code font: 14px/100% Arial, Helvetica, sans-serif; which is telling it that you want to use the font Arial, and if the user doesn’t have that font it will use Helvetica, and if they don’t have that font it will use any san-serif font like verdana, or something else. So you can just change that to be the (web-safe) font you want. You’ll also see font sizes like 14px, etc. Just change those to what size you want. So spotting font options in the code is pretty easy.
Changing colors in the buttons requires for you to change the colors according to hex values. So for example black is #000000 and white is #ffffff and so forth. There is a special color picker that you can install right into your iWeb that will add an extra tab in the default color picker with hex values. It makes it super easy to change colors and is a must for any iWeb designer. You can get it by going here. If you don’t want to install that (which you should) you can view an online color picker by going here. You’ll see the code to change colors under the section that’s labeled: /* iWebUnlimited Button Color */ then you’ll see a line of code that starts with “background” then it states the gradient color to and from. Just replace the # color code to what you want it to be.
As for sizes (width), you’ll notice at the very top of the code (the 2nd line) there is a line that has the width in it. Just change that width till your button fits. The current width of the buttons is so it fits the current text in it. So if you put some text in your button that is longer or shorter you’ll probably have to change this width so the snippet fits your button better.
So how do I change the button link and button text you say? Simple you’ll see a line of code that says “Button Link” towards the bottom of the code snippet. Just replace your link URL, then the text of the button you’ll see is wrapped in same code that’s called “span” tags. It’s labeled probably “button-#”, just change that to what you want, for example you might change it to “Learn More”, or “Contact Us”, etc.
I’ve added some code here so you can easily adjust the size and some styling of your button. Here’s some examples:
[iWeb-Code=’css_buttons2′]
To add these styles to your button just add the code below inside of the style tags right before the close </style> tag. Then you’ll need to add the link identifier to your link. Where is that, you ask? You’ll see in your link which starts with <a you’ll see a section that says class= then a bunch of css identifyers, for example you’ll see “iWebutton blue” for example. So to get the large button for example, just add the large code to the style section and put in the identifyer “large” so the full class part would look like this class=”iWebutton blue large”.
Here are the codes you’ll need to add to your code to get these styles:
[EXPAND XXLarge (identifier: “xxlarge)”]
[snipt code=”d0f20013da49b5680f8f6638017be51c”]
[/EXPAND]
[EXPAND XXLarge Rounded (identifier: “xxlarge rounded”)]
[snipt code=”0ca8ccc1dfa3db06be00547550b2bdba”]
[/EXPAND]
[EXPAND XXLarge Iconized (identifier: “xxlarge iconized”]
[snipt code=”e6a4cfac7aa236793087883f7d417c4c”]
[/EXPAND]
[EXPAND XLarge (Identifier: “xlarge”)]
[snipt code=”507ebf1f4f4b7956b870ba671862b2bd”]
[/EXPAND]
[EXPAND XLarge Rounded (Identifier: “xlarge rounded”)]
[snipt code=”11a5b219d2bdebdbe849ec92eada49cb”]
[/EXPAND]
[EXPAND XLarge Iconized (Identifier: “xlarge iconized”)]
[snipt code=”ae1990c3b6c518a57fbb1c1c6ff301dc”]
[/EXPAND]
[EXPAND Large (Identifier: “large”)]

[/EXPAND]
[EXPAND Large Rounded (Identifier: “large rounded”)]
[/EXPAND]
[EXPAND Large Iconized (Identifier: “large iconized”)]
[/EXPAND]
[EXPAND Small (Identifier: “small”)]
[/EXPAND]
[EXPAND Small Rounded (Identifier: “small rounded”)]
[/EXPAND]
[EXPAND Small Iconized (Identifier: “small iconized”)]
[/EXPAND]
[EXPAND XSmall (Identifier: “xsmall”)]
[/EXPAND]
[EXPAND XSmall Rounded (Identifier: “xsmall rounded”)]
[/EXPAND]
[EXPAND XSmall Iconized (Identifier: “xsmall iconized”)]
[snipt code=”6b4a78cbea2ee1005135e5a5146471e1″]
[/EXPAND]
So basically, you get the code from the first snippets, then if you want to customize that button with one of these styles above then add the code above the closing style tag and add the identifier to the link class. Here’s some screenshots to help you out.

So the final code would look like this:

If you are using the “Iconized” style in your button you have to add some extra code to the actual link itself. Here’s what your link should look like:
[snipt code=”b6f94520e3fbb6a398484dcf47aab385″]
Notice the link to an image. So basically you’ll need to upload an icon (that’s 16 x 16 at most in pixels) to your server, then link to it in the code. You’ll notice that the difference is that in the span tags we’ve added this one line of code that has the link to the image in it: style=background:url(https://iwebunlimited.com/examples/css_buttons/bird.png) no-repeat 0 45%;
That should do it. Hope you have fun with this tip and can add some of these great buttons to your site and if you can spare donation to the website and to support the iWeb cause here click the donate button below. Thanks so much and that for stopping by iWebUnlimited.com.
[iWeb-Code=’donation’]
I’ll be adding a video on this tip soon, so if you are a bit lost you’ll be able to follow the video to get these cool buttons on your site. Thanks again.


Hi, I was wondering if you could post a tutorial on how to make a CSS menu and use gradients. I have seen many tutorials, but no one actually writes it as clear as you. Thanks in advance for your help.
I downloaded the button and it works great. Thank you so much!
Very useful indeed! Thanks :D
And also, why have you removed the older buttons you added to this blog. I’m glad I visited this page when it first got released on your site, because one of the older buttons “button-4” was really good! I’m using on my site!
Supertecnoboff,
I removed some of the old buttons because they were not cross browser compatible. They worked great in Safari and Chrome, but not in Firefox or Internet Explorer. For that reason I removed all the non-cross browser buttons and added only buttons that would work with all browsers.
Hey everyone, I just updated the tip and all the buttons are now cross browser compatible. Have at it.
would you tell me where can I change the text? thanks
I try with the buttons and work perfectly on Safari and Firefox, but on IE there is a problem with the rounded corners.
Thanks. This is a great web. Congratulations!
This is very helpful…except the buttons look different in IE vs. Safari. Everything is IE is square, while Safari shows the rounded corners, etc. But you can at least see them now.
Thank You so much.
While I was waiting for your new buttons, I tried to adjust the code of the old buttons by myself.
They are now, cross browser compatible, but with different effect from mac to win.
The result is acceptable but now that You fix it, I’m going to replace the old buttons with these new buttons.
Waiting for new tips!
Thanks again
I was trying to change the text on button. but I couldn’t find it. where can I change the text. Thanks!
I was wondering if you have a tutorial on making drop down menus that look like the css buttons on this post. That would be cool.
Hi There, great site!
Any update on getting the corners to round on IE?
thanks very much for some much needed and well explained stuff. iWeb is a lot better than I first thought.
I’m trying to incorporate button 10 into my company website nav bar; the rectangular shape makes it ideal for putting back to back across the page, but the varying button width is not giving me the uniformity I’m looking for.
my question is, even if the button content changes is there a way to keep the button width the same?
Hi, how can i create a hyperlink on a button so it takes me to a page in my website..not an external website? thanks
To The iWeb Unlimited Team,
You Are Awesome Guys! We All Love Your Hard Work!!! Keep It Going. Great Job Again!!!
Thanks Again,
Sam “The Carpet Man”
My Way Carpet And Flooring
877-My Way Carpet
PS~ I am forwarding your site to many people and posting it on a facebook group (2000+ People)
Good Luck!
Hi i am trying to make a small site for my youtube channel.
Instead of using idisk I’m usin dropbox.
so i added this yellow subscribe button but when i click it it doesn’t go to my youtube subscribe page. I have to right click it and open it in a new page to load.
/* iWebUnlimited Button Code */
a.iWebutton {
display: inline-block;
zoom: 1; /* zoom and *display = ie7 hack for display:inline-block */
*display: inline;
vertical-align: baseline;
margin: 2px;
outline: none; /* remove dotted border in FF */
cursor: pointer;
text-align: center;
text-decoration: none;
font: 14px/100% Arial, Helvetica, sans-serif;
padding: .5em 1.75em .55em;
text-shadow: 0 1px 1px rgba(0,0,0,.3);
-webkit-border-radius: .5em;
-moz-border-radius: .5em;
border-radius: .5em;
-webkit-box-shadow: 0 1px 2px rgba(0,0,0,.2);
-moz-box-shadow: 0 1px 2px rgba(0,0,0,.2);
box-shadow: 0 1px 2px rgba(0,0,0,.2);
}
a.iWebutton:hover {
text-decoration: none;
}
a.iWebutton:active {
position: relative;
top: 1px;
}
/* iWebUnlimited Button Color */
.iWebutton.orange {
color: #fffdfb;
border: solid 1px #da7c0c;
background: #f78d1d;
background: -webkit-gradient(linear, left top, left bottom, from(#faa51a), to(#f47a20));
background: -moz-linear-gradient(top, #faa51a, #f47a20);
filter: progid:DXImageTransform.Microsoft.gradient(startColorstr=’#faa51a’, endColorstr=’#f47a20′);
}
.iWebutton.orange:hover {
background: #f47c20;
background: -webkit-gradient(linear, left top, left bottom, from(#f88e11), to(#f06015));
background: -moz-linear-gradient(top, #f88e11, #f06015);
filter: progid:DXImageTransform.Microsoft.gradient(startColorstr=’#f88e11′, endColorstr=’#f06015′);
}
.iWebutton.orange:active {
color: #fcd3a5;
background: -webkit-gradient(linear, left top, left bottom, from(#f47a20), to(#faa51a));
background: -moz-linear-gradient(top, #f47a20, #faa51a);
filter: progid:DXImageTransform.Microsoft.gradient(startColorstr=’#f47a20′, endColorstr=’#faa51a’);
}
Subscribe
Subscribe
I cling on to listening to the news lecture about receiving free online grant applications so I have been looking around for the best site to get one. Could you advise me please, where could i find some?
Thanks you so so so much!!!!! I will definately check back here when I need some help!
I was wondering if you can use this with custom shapes. If not, is it possible with any other code. And also, can you make one corner rounded, and one 90 degrees in the same button? Please give me some tips. I’m working on my site day and night, use like you :)
Hi – I have found and used your CSS buttons code for my Nav buttons – they look great. However, your explanation about resizing the buttons (by amending the 2nd line) does not work. I find that this only resizes the snippet box. The button won’t resize. I find that I am having to go into the code and amend the “5em 1.75em .55em” on the 16th line. I only found this out by messing around with things as well. I find that I am adjusting the 1.75em part by eye. Is this right? it seems a bit long winded and a bit hit and miss. Have a look at my Nav bar at http://www.steveburrowsimages.com
Love what you do and I’ve picked up a few really good tricks from you
Steve
After using the CSS buttons on my site, they were immediately apparent and functional on all browsers. They worked the 1st time accessed via the iphone, but now they are not visible on the iphone. I am perplexed.
thank you thank you thank so much this really helps!!
With the shadowbox zip for photos, you refer to putting the files into the local folder. I’m just publishing my site to a FTP so how do I use the shadowbox feature with this setup?
I’ve created this site for a friend. I’m having a problem with these buttons which seems to be a timing/paint issue. I use several of them as a vertical navigation bar. If the button is clicked on a page before the page is done painting (which is rather easy on this site in two particular locations that make external calls to Youtube for a Playlist and to a Form management website). I also can reproduce the issue on almost any of the windows by repeatedly clicking right after opening. What happens is the button will be filled with the text from the title textbox at the top of the page and become inoperable. The navigation href never fires. I have to refresh the window to get the button back and if I wait until the page has completed painting – I have not issue with it. Any suggestions for coding a work around? I like the button look and feel but am concerned with this bug from a user standpoint.
Why does the following code produce totally different results in Internet Explorer than it does on a Mac with Safari, Firefox, Chrome or Opera?
/* iWebUnlimited Button Code */
a.iWebutton {
display: inline-block;
zoom: 1; /* zoom and *display = ie7 hack for display:inline-block */
*display: inline;
vertical-align: baseline;
margin: 2px;
outline: none; /* remove dotted border in FF */
cursor: pointer;
text-align: center;
text-decoration: none;
font: 14px/100% Arial, Helvetica, sans-serif;
padding: .5em 1.75em .55em;
text-shadow: 0 1px 1px rgba(0,0,0,.3);
-webkit-border-radius: .5em;
-moz-border-radius: .5em;
border-radius: .5em;
-webkit-box-shadow: 0 1px 2px rgba(0,0,0,.2);
-moz-box-shadow: 0 1px 2px rgba(0,0,0,.2);
box-shadow: 0 1px 2px rgba(0,0,0,.2);
}
a.iWebutton:hover {
text-decoration: none;
}
a.iWebutton:active {
position: relative;
top: 1px;
}
/* iWebUnlimited Button Color */
.iWebutton.blue {
color: #f2fbff;
border: solid 1px #ffffff;
background: #0606E7;
background: -webkit-gradient(linear, left top, left bottom, from(#00adee), to(#0606E7));
background: -moz-linear-gradient(top, #00adee, #297002);
filter: progid:DXImageTransform.Microsoft.gradient(startColorstr=’#00adee’, endColorstr=’#297002′);
}
.iWebutton.blue:hover {
background: #297002;
background: -webkit-gradient(linear, left top, left bottom, from(#297002), to(#297002));
background: -moz-linear-gradient(top, #297002, #297002);
filter: progid:DXImageTransform.Microsoft.gradient(startColorstr=’#c9151b’, endColorstr=’#a11115′);
}
.iWebutton.blue:active {
color: #de898c;
background: -webkit-gradient(linear, left top, left bottom, from(#aa1317), to(#297002));
background: -moz-linear-gradient(top, #297002, #ed1c24);
filter: progid:DXImageTransform.Microsoft.gradient(startColorstr=’#aa1317′, endColorstr=’#ed1c24′);
}
<a href="http://www.garlandcountydemocrats.org/New_Elected.html" Newly Elected Officials
Would really appreciate a response.
Hi there,
Need some help. How do I adjust the width of the button. I made the changes to line 2 “” all this did was to extend the width of line around the button but not the actual button. Eg. I have a button called Inicio and another called Biografia. The Biografia button is much wider than the inicio button due to the number of letters.I need that all the buttons are the same size.