iWeb Tip #14 – Highslide JS in iWeb

 Here it is, finally a fancy zoom that will allow us to get not only images, but flash, video, and other html content. So first let me answer the question, what is Highslide JS? Highslide JS is a great way to get that ever so popular image zoom effect just like the fancy zoom post I did in the past. The difference is, is that this one will give you the ability to zoom more than just images. Though FancyZoom is a bit more light weight, there are some great advantages to Highslide. This tutorial you will need the use of an HTML editor like Coda, Espresso, Dreamweaver, even TextEdit. Just as long as you have some way to edit the html after iWeb publishes. I try to do as many tutorials trying not to get into post published html, but sometimes you just gotta do it to get the desired effect. So here is an easiest way I’ve found to get it into iWeb.
Highslide with Images | Highslide with Flash Files | Highslide with iFrames
To get started I will separate the tip into Images, Flash, and iFrames (which would include any other html page (websites, videos, youtube, etc)). Here we go:
Highslide with Images:
Step 1) Add an any image(s) or graphic(s) to your page in iWeb.
Step 2) Open up the inspector and make it a hyperlink in the hyperlink inspector. Choose to Link To: “A File” and choose the same image (so it basically it is linked to its self).
Step 3) Publish site to Folder, Server, or MobileMe iDisk – Whatever your method is.
Step 4) Download files. I’ve made a special iWeb version of Highslide to simplify things.
Step 5) Unzip the downloaded file called “highslide_iweb.zip” and you will see a folder simply called “highslide”. ![]() Drop that folder into your published site folder (not your webpage folder). When publishing iWeb makes a index.html file and your site folder (named whatever you named it in iWeb), this is the folder you want to drop this highslide folder into.)
Drop that folder into your published site folder (not your webpage folder). When publishing iWeb makes a index.html file and your site folder (named whatever you named it in iWeb), this is the folder you want to drop this highslide folder into.)
Step 6) Open your favorite HTML Editor (Coda, Espresso, TextEdit) and you are going to find and replace the code below:
Find:
</head>
Replace with:
<script type="text/javascript" src="highslide/highslide-full.js"></script>
<link rel="stylesheet" type="text/css" href="highslide/highslide.css" />
<script type="text/javascript">
hs.outlineType = 'rounded-white';
hs.wrapperClassName = 'draggable-header no-footer';
hs.align = 'center';
hs.transitions = ['expand', 'crossfade'];
hs.dimmingOpacity = 0.75;
hs.graphicsDir = 'highslide/graphics/';
</script></head>
Step 7) Now we’re going to find and replace one more item:
Find:
title="pagename_files/imagename_1.jpg">
Replace with:
title="Click to Enlarge" onclick="return hs.expand(this)">
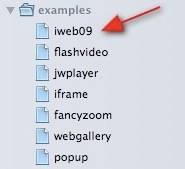
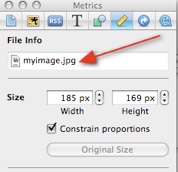
When it says “pagename” that means whatever the title of your webpage you are doing this one in the sidebar of iWeb and imagename is the name of the photo you put on the page. If your not sure what these names are, you can go back into iWeb and take a peek. Here’s where you will look.
So for example if I was wanting this effect on my page called “iweb09” in my sidebar and my image was named “myimage.jpg”, then my replace code would be:
title=”iweb09_files/myimage_1.jpg”>
Important Note: If you are linking to a shape made in iWeb take off the “>” tag at the end of the search and replace. If you are linking an image to text get rid of the “_1” at the end of the find code.
Basically your are replacing the “title=…” tag of your items. So if your having a tough time finding the right items to replace just do a search for “title” and copy that whole line “title=”mypage_files/myimage_1.jpg”>” and paste it to replace with the other code.
Step 8 ) Save your modified html file online and your good.
Highslide with Flash Files:
I’m going to go through the flash one a bit faster assuming you’ve gone through the image one already. So I’m just going to give you the quick steps:
- Make flash file (Adobe Flash, Keynote, Bannersnack, etc) be ready to link to it on your hard drive.
- Make or get an image or button to represent that file (this will be your button. It could be anything really, text, shape, image, etc) and put it on your iWeb page.
- Link image/button to .swf file from the hyperlink inspector as a “A File”
- Publish site
- Add “highslide” folder to published site folder
- Open your html page with HTML editor and find and replace the following code:
Find:
</head>
Replace with:
<script type="text/javascript" src="highslide/highslide-full.js"></script>
<script type="text/javascript" src="highslide/swfobject.js"></script>
<link rel="stylesheet" type="text/css" href="highslide/highslide.css" />
<script type="text/javascript">
hs.outlineType = 'rounded-white';
hs.wrapperClassName = 'draggable-header no-footer';
hs.preserveContent = false;
hs.align = 'center';
hs.transitions = ['expand', 'crossfade'];
hs.dimmingOpacity = 0.75;
hs.graphicsDir = 'highslide/graphics/';
</script></head>
7) Now find and replace these:
Find:
title="pagename_files/flashfile.swf">
Replace with:
title="Click to See Flash" onclick="return hs.htmlExpand(this, { objectType: 'swf', width:300, objectWidth: 300, objectHeight: 250, maincontentText: 'You need to upgrade your Flash player' } )">
8 ) Replace the items in red with your page name, flash file name, file width (twice), and height.
9) Save your page make sure it’s online and your set. It looks pretty cool.
Highslide with iFrames:
Again I’m going to go through this one fast assuming you’ve gone through the image one already. So I’m just going to give you the quick steps:
- Create or Find your webpage that you’ll be iFraming in the highslide zoomer and put it online.
- Make or create an image or button or text that will pull up this iFrame when user clicks on it and make it a hyperlink in the inspector to “An External Page” and type in the full address of the page (example http:www.iwebunlimited.com/iwebtips/iwebtips.html)
- Publish site
- Drop “highslide” folder (downloaded from above) in published site folder
- Open html file with html editor and find and replace the following code:
Find:
</head>
Replace with:
<script type="text/javascript" src="highslide/highslide-full.js"></script>
<link rel="stylesheet" type="text/css" href="highslide/highslide.css" />
<script type="text/javascript">
hs.graphicsDir = 'highslide/graphics/';
hs.outlineType = 'rounded-white';
hs.wrapperClassName = 'draggable-header no-footer';
hs.useBox = false;
hs.width = 600;
hs.height = 450;
hs.align = 'center';
hs.transitions = ['expand', 'crossfade'];
hs.dimmingOpacity = 0.75;
</script></head>
6) Then find the following code and replace it:
Find:
title="https://www.yourlinkyouadded.com">
Replace with:
title="Click to Enlarge" onclick="return hs.htmlExpand(this, { objectType: 'iframe' } )">
7) Replace what’s in red with the size your want the highslide to be and the page you linked to. Save online and your set.
Note: If you have a page that has all of these items images, flash, and iFrames. Use this code to replace in the <head> tags as the first thing you replace
Find:
</head>
Replace with:
<script type="text/javascript" src="highslide/highslide-full.js"></script>
<script type="text/javascript" src="highslide/swfobject.js"></script>
<link rel="stylesheet" type="text/css" href="highslide/highslide.css" />
<script type="text/javascript">
hs.outlineType = 'rounded-white';
hs.wrapperClassName = 'draggable-header no-footer';
hs.preserveContent = false;
hs.align = 'center';
hs.transitions = ['expand', 'crossfade'];
hs.dimmingOpacity = 0.75;
hs.useBox = false;
hs.width = 600;
hs.height = 450;
hs.graphicsDir = 'highslide/graphics/';
</script></head>
Then replace the second one’s with the ones above in their sections with their links.
It makes for a pretty neat effect. Hope you find it helpful and if your not very comfortable using external editors, just take it slow, be very careful of your code and if you mess up, no big deal, just republish from iWeb and it’ll be brand new again to try again.


Hi dear!
Very good job! Thanks for all your labor. But I do face a problem.
1. I finish my page in iWeb and upload it to my server
2. I open this page from TextWragler, I replace all the necessary, [title=”Click to Enlarge” onclick=”return hs.expand(this)”>] etc,
3. I ftp the NEW page, replace it with the one I have created in iWeb
and all works fine….BUT…!
If I go back to iWeb, and change something in the page, and re-upload it to my server
then, I have to go through all the same process!!
Now can you imagine having 100 or 200 images how difficult this would be?!!
Hope there is a solution on this matter dear…
Thanks for your understanding!
Hi, Aver,
It’s almost a month later, but in case you’re still wondering (or someone else is), whenever you republish your site from iWeb, all the files associated with pages you’ve changed will be overwritten with new versions — which will overwrite any changes you’ve added manually. You might use 2 strategies:
– make sure your pages area absolutely finished before you manually add the HighSlide code, or
– make a copy of your manually edited files before making any changes in iWeb, make any changes in iWeb that are necessary and republish, then copy any of the manual changes you made from your saved file into the new file. Just make sure you don’t save the extra file into any of the directories that iWeb creates, because when you publish, your saved files will be removed.
Hope this helps you … or someone else.
(For more advanced users, you can save yourself some of this hassle by creating another directory/folder at the level above the directory that iWeb creates on your server to hold some of static files (like the js and css files), and then change the related paths in the section using the “../” convention to move up a directory level. E.g., if my iWeb site is called MySite and you create a new directory called MySite_myfiles and move the highslide folder that you’ve downloaded in this tip here, then the path to the highslide-full.css file would change from highslide/highslide.css to ../MySite_myfiles/highslide/highslide.css.) Etc.
(Note that I’m talking about changing the paths in the section of your html page — you will still have to do this manually each time you republish. That’s why it’s important to do all your tweaking in iWeb BEFORE you add the HighSlide code that is described in this tip.)
BTW, this site is amazingly helpful!! I’ve donated, and hope everyone that gets some help from the site does the same. It takes a lot of time and effort to put together a site like this! (And no, I don’t know the author!! :)
I want to install wordpress on one domain name but using that same wordpress have a select category come up under a different domain. Is there a way to do this?.
Can this be used to load Premium beat multimenu player with songs
Thank you thank you thank you thank you!!!!!
Hi
I’m having a lot of trouble understanding your instructions I’m afraid.
Firstly, let me explain the item I am trying to link. I am linking a text box to your Highslide. The reason for this is that if a person right clicks an image, they can save the image to their own computer and steal the image very easily. If i put a text box over it, the option to save image does not appear. I know that there are other ways of stealing images (screen shots etc) but at least it will reduce the amount of attempts. See my “company” page on my website http://www.steveburrowsimages.com. I have 3 images there as this is the page I want to test your Highslide.
Now for my issue.
Your instructions trip me up at step 5. I can see your folder and drop it in as you explain. I understand that iWeb creates an index file as you illustrate next to the website folder with the red arrow pointing at it. You then say “Open your favorite HTML Editor (Coda, Espresso, TextEdit) and you are going to find and replace the code below:” I open TextWrangler but it opens with a blank screen. Obviously. Are you saying open the index.html file in TextWrangler? And then find the as you say? I am a bit of a Newbie to all this and it doesn’t matter how many times I read your instructions, I am not able to follow you.
The end result I am trying to get is that the link will direct you to an expanding Highslide image. I will have a square thumbnail image on the screen as per the images you can see, but when you click on the image (actually clicking a text box as I explained earlier), the full size image will Highslide out.
Please can you help me here? Also. I know I am going to have to do this for every image I want a Highslide attached to? And, will I have to do this over again every time I make any adjustments to my website?
Hopefully you will reply soon.
Many thanks
Thanks a lot for this tutorial!! Its great but for me didn’t work out :(. Opens the image in the navigator instead of making a zoom on it as in your example.
—-
For SBurrowsimages
I faced the same problem as you and what I understood (after all) is that you have to drag the highslide in the folder of the page ex: about, or company, you will see and about.html and then a folder name about (there is where you have to drag the highslide) and replace the and the title= opening with the text edit the about.html for example.
For me didn’t work out the zoom but maybe the problem is me. Try it and good luck, and if someone figure out what I’m doing wrong, help is more than welcome :-)
Hi there,
Really appreciate you taking the time to make these tutorials, they’re fantastic.
For this one in particular, however, I do not have an html file to edit when I unzip the files.
I can’t complete the tutorial without the code!
Any help appreciated!
Thank you.
Hallo.. I try to instal Highslide with contact form in Iweb 3.0.4 but but without success..
And I would also install a nice slide on the home page ..
Would you if are interested and I will send you to Iweb pages edit for me ?
Obviously a payment ..
Also thanks your tutorials are really well done !
Salvatore’s
Hello,
I have spent the last two days trying to get Highslide to work. It works perfect on my local folder, but when I publish it, the pictures show up in a new regular size page, but they are enlarged. I have compared the local folder with the host site files and everything is exactly the same.
I cannot figure out what I am doing wrong. If you could decipher, I would be most grateful.
Kathryn
Hey Kathryn, I’m having the exact same problem as you, I have been messing with this for forever and everything looks perfect but it is still not working for me either, I know you posted this comment several months ago but I was wondering, did you ever find the solution? Thanks in advance
Or Jason, if you could tell us what we’re doing wrong I would appreciate it so much, thanks
Mike
I love the high slide but wondered whether it can be linked to a timer so after 30 seconds it closes. It sounds like it should be feasible but I don’t have the skills to work it out. Can it be done?